How to organise research for an essay, from readings to draft
Start from the question, keep every reading in one place, note page numbers as you go and map the argument before you draft. A method for research essays.
A research essay goes well when the reading serves the question, not the other way round. The method is six steps: start from the question, collect every reading in one place, take notes with the source and page number every time, map the argument before you draft, draft with your notes beside you, and plan the whole thing back from the deadline.
Each step works with paper, folders or any app you like. After the general advice in each section, you will see how the same step looks on one desk per assignment in PlexiDesk.
Start from the question
Read the question twice, then read the marking criteria. Underline the instruction words, because each one asks for a different essay. "Discuss" wants several sides weighed. "Evaluate" wants a judgement. "To what extent" wants a position somewhere between yes and no, and a reason for where you put it.
Then do three things before you open a single reading:
- Rewrite the question in one sentence of your own. If you cannot, ask your tutor now, not the week it is due.
- Write a provisional answer. One sentence: what you expect to argue. It will change, and that is the point. A provisional answer turns reading from collecting into testing.
- List three to five sub-questions your answer depends on. These become the headings for your notes, and later the sections of your essay.
It is a short job, and it saves a lot of reading that turns out not to matter. If you would like to see an assignment set up this way before you start, you can build a desk for your own course work in the interactive demo: choose your role, describe the assignment, and it lays out a desk for it.
Collect every reading in one place
Keep every source for the assignment in one place, and capture the full reference details the moment you find something: author, year, title, journal or publisher, page range, and the DOI or web address. Reconstructing references the night before the deadline is slow and error-prone.
Not every reading deserves a full read. Skim the abstract, the introduction, the headings and the conclusion, then sort it:
- Core: read closely and take full notes.
- Useful for one point: read the relevant section.
- Background: skim and summarise in two lines.
- Not relevant: note why, so you do not come back to it.
Browser tabs are not a filing system. If your reading list currently lives in dozens of open tabs, a calmer way to keep your research shows how to sort them into what you need now, what to file and what to close.
PlexiDesk gives each assignment its own desk, as the page for university students shows: the readings, your notes, the draft and the deadline in one view. Drop a PDF onto the desk and it becomes a File or link widget, where you can scroll, page through and zoom without opening another app. The file is copied into your workspace, so it keeps working even if you move the original. A web article can sit in the same kind of widget as a link card that opens in your browser.
Take notes you can cite later
A lot of referencing pain comes from notes that do not say where they came from. Three habits prevent it:
- Source and page on every note, every time. Write it as you go, in a fixed form such as (Author, year, p. 41). It takes seconds now and saves a long search later.
- Keep three kinds of note apart. Quotes are the author's exact words, in quotation marks. Paraphrases are their ideas in your words. Your own thoughts are marked as yours, for example with "Me:" at the start. Keeping them apart stops you from passing off someone else's wording as your own by accident.
- Tag each note with the sub-question it answers. When you draft a section, its evidence is already gathered.
When you finish a reading, write two lines: what it argues, and how it bears on your question. Those summaries become the backbone of your background section, or of a literature review if the essay needs one.
On a PlexiDesk desk, Plexii, the assistant built into the app, can help you find things again. It searches your own work, including your notes, documents and files, and every answer lists the sources it used, which you can open to check. So "Which reading talked about licence fees?" gets an answer with sources you can open and look through. It gives you the source rather than the page, so keep writing page numbers into your own notes. Plexii finds where things are; the thinking and the writing are yours. It needs AI to run: PlexiDesk AI credits while you are signed in, or your own Anthropic key. Before you use any AI tool for coursework, check your own university's policy on AI use.
Map the argument before you draft
Before you write a paragraph, lay out the argument:
- Put your answer in the centre.
- Make a branch for each claim or sub-question that supports it.
- Under each branch, list the evidence, with its source and page.
- Add the strongest counterargument to each branch, and your response to it.
Now look for gaps. A branch with no evidence needs more reading or needs to go. Evidence that fits no branch is either a new point or a distraction. Then decide the order: what does the reader need to know first for the rest to make sense? The finished map is your outline. Give each main branch a word budget, so a 2,000-word essay does not end up with 900 words on background.
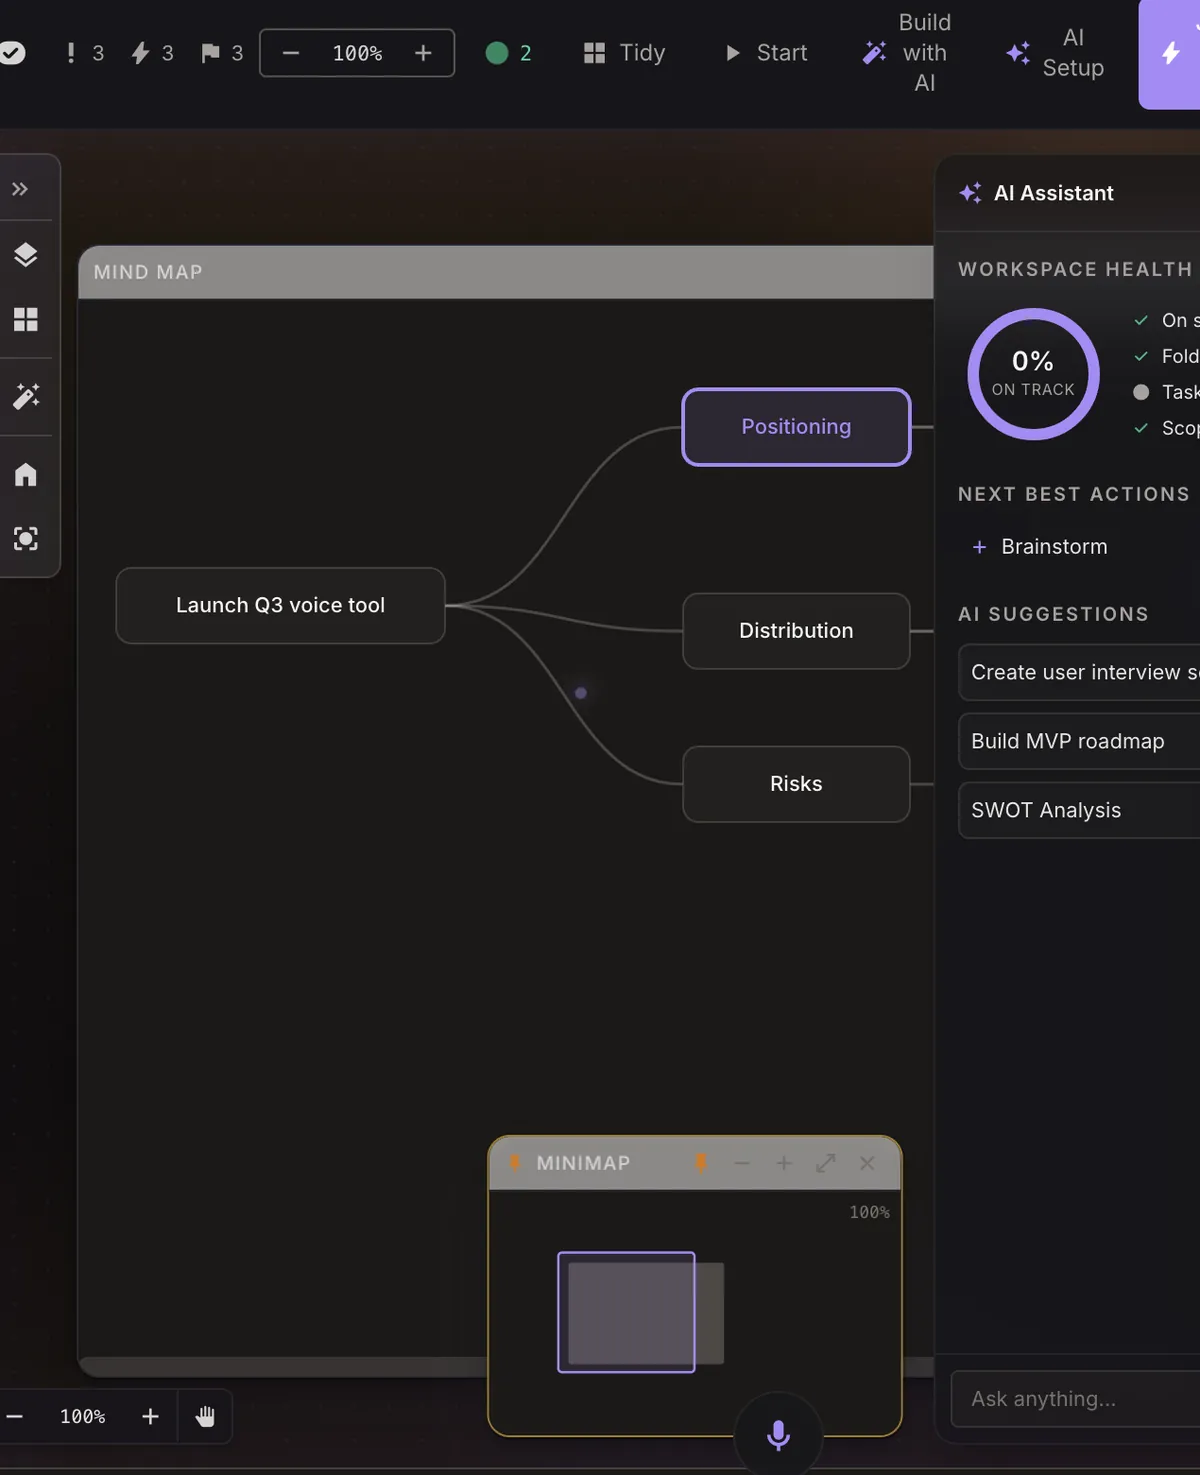
On a desk, a Mind map widget does this job. Name the central idea, add branches with Add child and Sibling, and give each branch a type, such as idea, task or question, so open questions stand out. Double-click a branch to focus on it and everything under it. When a branch shows you a gap, Convert to task turns it into a task on the desk, such as "find a second source on the 1855 reforms". Build with AI can suggest branches from what the desk is about, and adds just the ones you tick. Treat any suggestion as a question to check against your readings, not as your argument.
Draft with your notes beside you
A first draft does not have to be written from the top. Start with the section you know most about, and aim for a complete rough draft before you polish anything.
Build each paragraph from three parts: the point, the evidence with its citation, and an explanation of how the evidence supports your answer. Put citations in as you write, even rough ones, rather than promising yourself you will add them later. And if you are stuck at the start of a session, set a timer and write badly for five minutes; a five-minute start shows how to make that a habit.
Keeping your notes and map in view while you write makes all of this easier. In PlexiDesk, the draft can sit on the same desk in a Document widget: a PlexiiDocs document with page view, a word count and export to Word or PDF. If you have already started in a Word file, Import a file brings the .docx in with its formatting. The document's own Focus button dims everything except the paragraph you are writing.
When you want the reading and the draft side by side, open the draft in focus mode, which fills the window with one widget. Then drag another widget's thumbnail up from the dock, and the two sit in panes next to each other. You can have up to four panes, so the PDF, your notes, the mind map and the draft can all be in view at once. PlexiDesk saves the group, so it opens the same way next time.
Plan back from the deadline
Work backwards from the submission date and give each stage a date of its own:
- Submission, with a buffer of a day or two before it for things going wrong.
- Final proofread and referencing check. Give this its own slot; it tends to take longer than you expect.
- Complete draft finished.
- Each section drafted, in the order you plan to write them.
- Argument map finished.
- Reading stops. Reading expands to fill whatever time you give it, so set a date when it ends and writing begins.
Check your word count against each section's budget as you go, so the last section is not squeezed.
In PlexiDesk, give the assignment's desk a due date when you create it. Each stage can be a task with its own due date in a Tasks widget on the desk, and a task can wait for another, so a stage's start follows the due date of the one before it. Group the list by when, and you see what is overdue, what is due today and what is coming this week.
To see the whole method on one screen, with readings, notes, a mind map and a draft side by side, build an assignment desk in the interactive demo, or read more on the page for university students.